
Connecting C++ to JavaScript using WASM
Introduction
Recently, I have been doing a lot of web development. I wanted to use a reasonably non-trivial C++ library of statistical functions in a web application that uses a basic client-side HTML/CSS/JavaScript stack. The intention here, as on previous occasions (Software Interoperability), was to see how feasible (and easy or otherwise) it is to build a component to connect a native C++ library to JavaScript. The more general use-case is to provide access to any native C++ functionality and make it available in a browser (hence cross-platform).
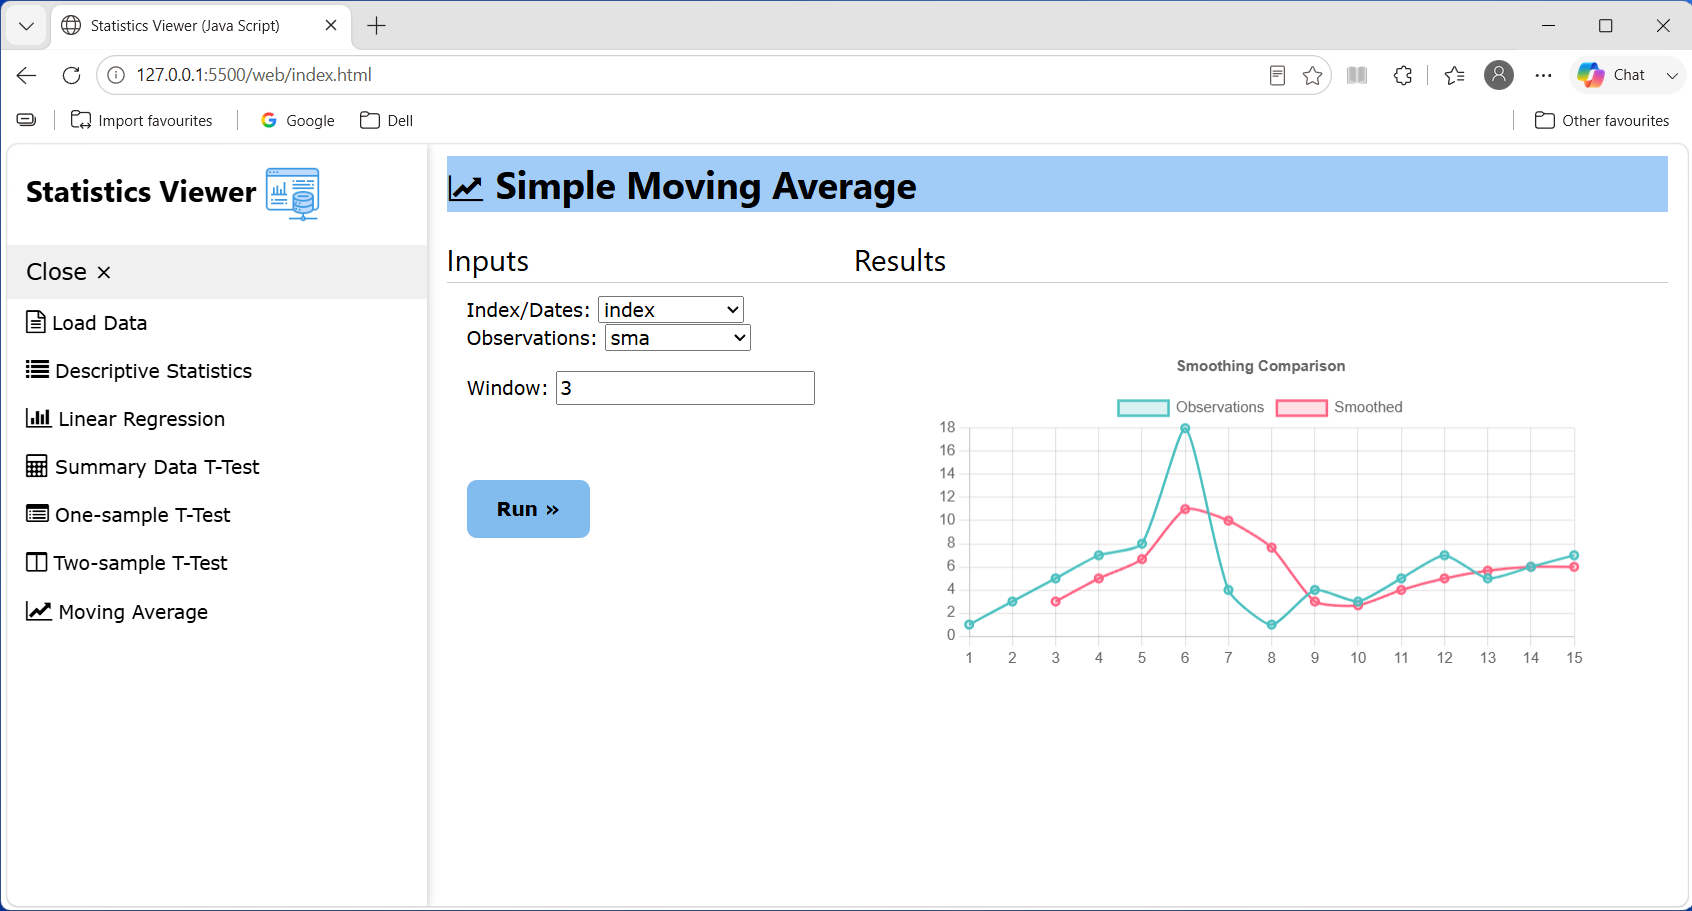
This blog post describes the steps required to compile a native C++ library to WebAssembly(WASM), and to use this in a simple web application. The resulting application is shown below.
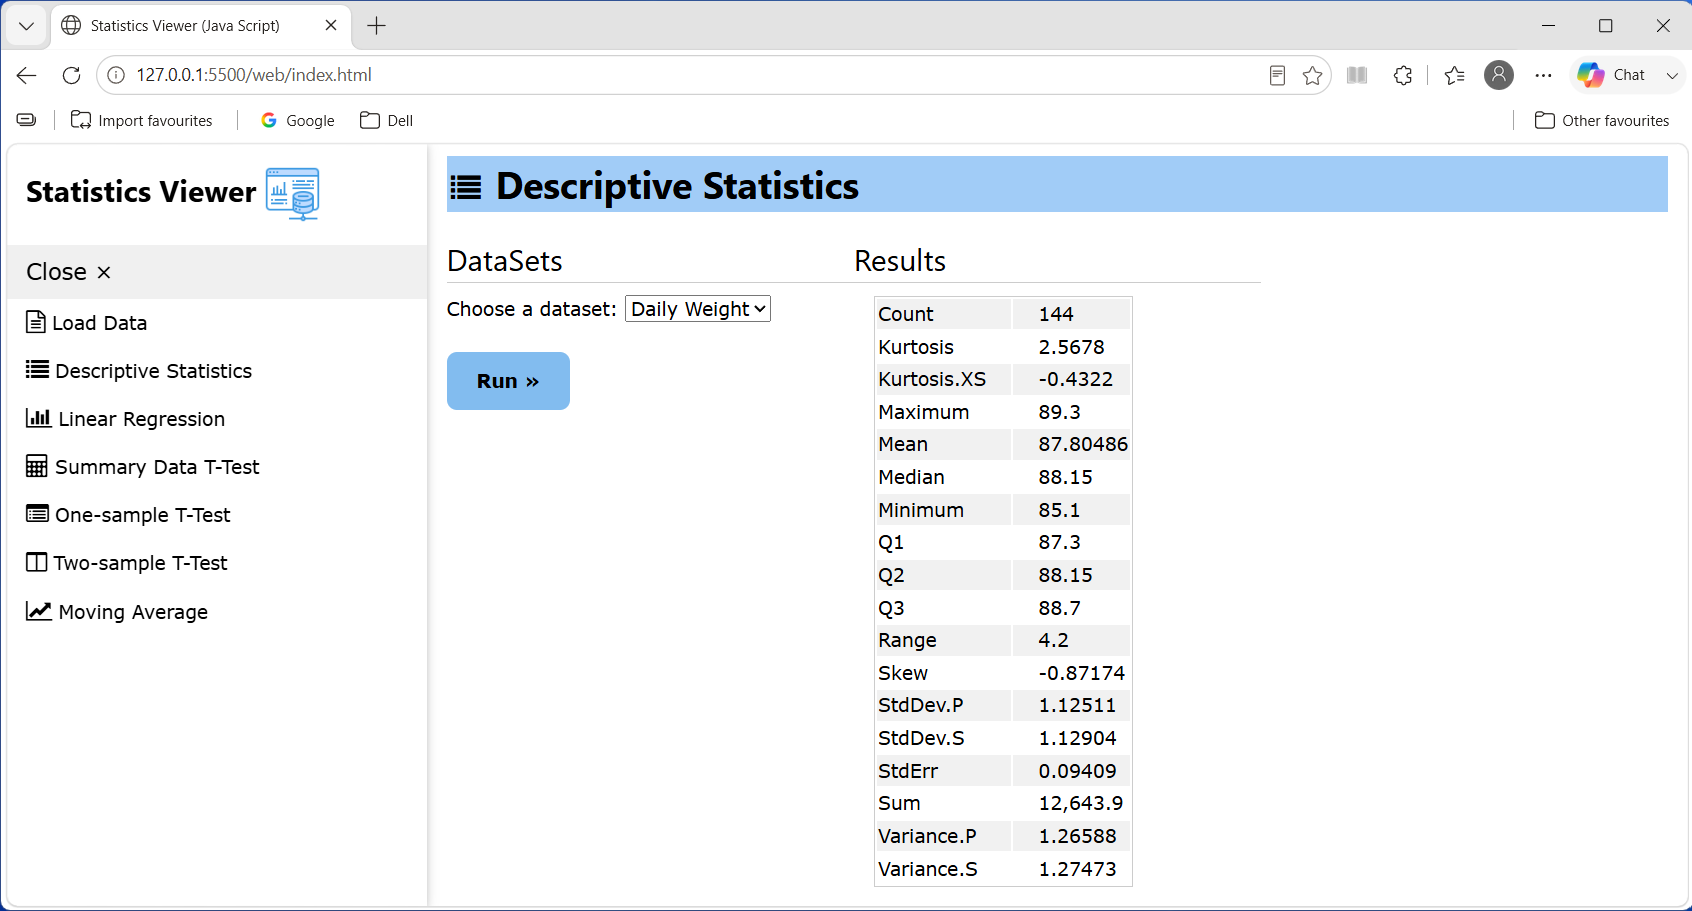
The full project is available here.
Emscripten
The main tool that we use is emscripten. The documentation describes emscripten as a complete Open Source compiler toolchain to WebAssembly. More specifically using Emscripten you can:
- “Compile C and C++ code, or any other language that uses LLVM, into WebAssembly, and run it on the Web, Node.js, or other Wasm runtimes.”
- “Compile the C/C++ runtimes of other languages into WebAssembly, and then run code in those other languages in an indirect way (for example, this has been done for Python and Lua).”
My own interest here is in compiling a C++ library for use in a basic web application. Specifically, the goal is to produce a WebAssembly module that contains (and exports) all of the functionality from the library that we want to consume from JavaScript. emscripten provides all the necessary tools to manage this. It is also well-documented. Follow the Emscripten documentation for instructions on how to install the SDK. The rest of this post will assume that you have activated the latest Emscripten SDK in your PATH via source ./emsdk_env.sh (or emsdk_env.bat on Windows).
The C++ Library
The C++ library that I use is called StatsLib. The library is written in C++20 and uses boost 1.91. I have used this on previous occasions to demonstrate software interoperability with C++ from languages like C#, Python and R. The library consists of a number of classes and functions to perform basic statistical analyses. DescriptiveStatistics provides summary data for a given dataset. LinearRegression performs a univariate linear regression. And there are a number of classes derived from StatisticalTest that form a class hierarchy for handling statistical hypothesis tests. There are classes to perform a student’s t-test, a z-test and an F-test. There is also a class that performs a basic moving average as part of a time series analysis. Finally, the DataManager class provides a simple caching mechanism for datasets. It enables users to load datasets from files, then store and retrieve them by name on demand.
There were two main reasons for using this library. Firstly, I wanted an example that was not completely trivial as this obscures and ignores important (possibly critical) issues. But also not too complex like the SkiaSharpViews. A good number of WebAssembly examples are based on a single C function (add, fib etc.) with simple ‘blittable types’. However, I want to be able to use STL types (std::vector, std::map, std::string), and I also want to use classes, methods, and properties.
Secondly, most of the information about WebAssembly focuses specifically on the performance aspect rationale for using a C++ library in a web application hosted in a web browser. However, I think there is a more general use case applicable to any C++ code. One of the main attractions of WebAssembly is that it allows us to leverage the vast library of existing open-source C and C++ code in web applications.
Project
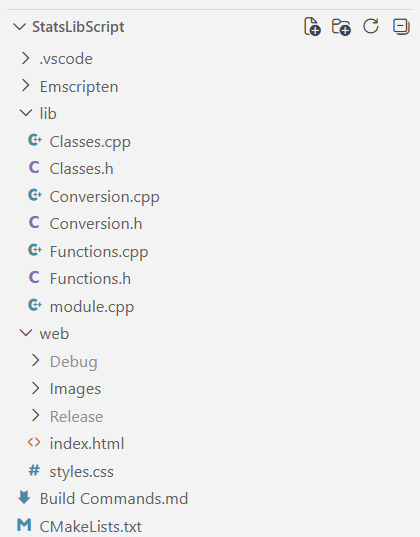
StatsLibScript consists of a single project.
 .
.
The StatsLibScript folder is divided into \lib and \web sub-folders. The \lib folder contains the sources and the \web folder contains the web application.
The StatsLibScript Component
The \lib folder contains the C++ code that is compiled into wasm. This consists broadly of the emscripten bindings and auxilliary classes/functions that help with the communication between C++ and JavaScript.
The auxilliary classes/functions are:
-
Conversion.h/Conversion.cpp
This is where we locate any functions needed to convert between native C++ (and STL) types and types understood by JavaScript/Wasm. The only conversion of interest concerns the results returned from StatsLib functions. In general these are returned as a
std::unordered_map<std::string, double>. However, even after registering this type (see below), wasm did not appear to ‘process’ it. As far as I could tell, there is no template defined for thisMapTypeinbind.h. Therefore, I wrote a conversion to astd::map<std::string, double>. An earlier version of the component made use ofemscripten::val vwhich allows converting JavaScript types to C++. However, these turned out not to be needed as the bindings specified inmodule.cpp(see below) worked directly. -
Functions.h/Functions.cpp
This contains all the function wrappers which are called through the bindings.
-
Classes.h/Classes.cpp
This contains proxy classes for the
DataManager,TTestandZTestclasses of StatsLib. These are not strictly necessary if the C++ types can be registered (or for classes where the specific functionality is not exposed). But with functionality likeDataManager::ListDataSetswe needed to convert fromstd::vector<DataSetInfo>to the registered ‘VectorString’ type i.e.std::vector<std::string>. Similarly, to handle the results coming back fromTTestandZTestclasses we convert to the registered ‘MapStringDouble’ type i.e.std::map<std::string, double>. -
module.cpp
This contains the main module with the emscripten bindings. The macro
EMSCRIPTEN_BINDINGS(my_module)contains the definitions of the bindings. These are the functions that JavaScript will call and the classes that can be used.
In detail, first off, we register vector and map types. This allows us to use these types conveniently from JavaScript, e.g.:
let xs = new Module.VectorDouble();
xs.push_back(0.0);
xs.push_back(1.0);
...
This vector can be passed directly to C++ functions/classes. We can also iterate over the values and convert to a JavaScript array:
let arr = new Array(xs.size()).fill(0).map((_, id) => xs.get(id));
console.log("DataSet: ", arr);
The module also defines the functions we want to overload. We use the select_overload method in embind to define two overloads for the DescriptiveStatistics function, with or without a list of keys that identify the results we want to retrieve:
let keys = new Module.VectorString()
keys.push_back("Mean");
keys.push_back("StdDev.S");

const results = Module.DescriptiveStatistics(xs, keys)

console.log("Mean: ", results.get(keys.get(0)));
console.log("StdDev.S: ", results.get(keys.get(1)));
We also declare an enumerated type mapped to the underlying C++ type:
enum_<StatisticsLibrary::DescriptiveStatistics::VarianceType>("VarianceType")
    .value("Sample", StatisticsLibrary::DescriptiveStatistics::VarianceType::Sample)
    .value("Population", StatisticsLibrary::DescriptiveStatistics::VarianceType::Population);
This can then be used in JavaScript:
console.log("Standard Deviation (Population): ", Module.StandardDeviation(xs, Module.VarianceType.Population));
console.log("Standard Deviation (Sample): ", Module.StandardDeviation(xs, Module.VarianceType.Sample));
Finally, we define the wrapper classes in terms of constructors and functions. The DataManager class takes a simple constructor, followed by a number of functions. The TTest/ZTest wrappers both have multiple constructors. It is worth pointing out that the overload resolution is done using the number of arguments, not the types. This causes a slight issue in the case of the T-Test. The arguments for the second and third constructor are either a double and a std::vector<double> or two std::vector<double>’s. Since they have the same number of arguments, embind doesn’t distinguish between the two.
For example,
.constructor<double, double, double, double>()                          // 4 args - OK
.constructor<double, const std::vector<double>&>()                      // 2 args - double and vector
.constructor<const std::vector<double>&, const std::vector<double>&>()  // 2 args - vector and vector
When calling this from JavaScript, it does not distinguish the case of 2 args. To work around this we added a dummy initial third argument, which is not ideal.
Depending on the exact requirements of the C++ library that is being exposed, there is a lot more that can be done. This is covered in the emscripten documentation. This project only just scratches the surface.
Compiling & Building
Compiling and building consists of a single command line:
emcc --bind module.cpp Conversion.cpp Functions.cpp Classes.cpp
	<path>/SoftwareInteroperability/Common/source/DataManager.cpp
	<path>/SoftwareInteroperability/Common/source/DescriptiveStatistics.cpp
	<path>/SoftwareInteroperability/Common/source/StatisticalTests.cpp
	<path>/SoftwareInteroperability/Common/source/StatisticsLibrary.cpp
	<path>/SoftwareInteroperability/Common/source/TimeSeries.cpp
	-O0
	-o StatsLibScript.js
	-sENVIRONMENT="web"
	-I D:/Libraries/boost_1_91_0/
	-I <path>/SoftwareInteroperability/Common/include/
	-std=c++20
	-sNO_DISABLE_EXCEPTION_CATCHING
	--no-entry
We have referenced the sources directly, just for convenience. We could equally have built (an LLVM compatible) library file and included it. Use this link for additional information regarding building projects. There are a number of useful compiler flags. We have only used a small subset here. The break down is as follows:
- -O0 optimisation level for Debug
- -o output a java script ‘bootstrap’ file
- -sENVIRONMENT=”web”
- -I …include boost library and the common includes for StatsLib
- -std=c++20 specifies the C++ language standard
- -sNO_DISABLE_EXCEPTION_CATCHING flag to indicate that we want to enable exception handling. This allows us to decorate the JavaScript functions with
try { ... } catch(e) {}blocks and process the native C++ exception. - –no-entry
After the build, we copy the artifacts to the Debug or Release directory.
copy "StatsLibScript.js" "../web/Debug/StatsLibScript.js"
copy "StatsLibScript.wasm" "../web/Debug/StatsLibScript.wasm"
For convenience, I have set this up so that it can be built from a single command line and run (using live server) from Visual Studio Code. This seemed to me the easiest approach for development. However, there is also a CMake project and a Visual Studio 2022 solution if you prefer. Further details relating to the build can be found in: Build Commands.md.
The ‘Statistics Viewer’ web application
The \web folder contains the web infrastructure and the debug and release build outputs. There is a single index.html file and a stylesheet (styles.css). index.html contains the main code to load the StatsLibScript.js module.
To use the WebAssembly module, we reference the compiled StatsLibScript.js in the script element:
<script src="Debug/StatsLibScript.js"></script>
We also need a script tag to initialise the module.
	Module.onRuntimeInitialized = _ => {

		const v = Module.getVersion();
		console.log("Version =", v);

		console.log("Initializing DataManager...");

		dataManager = new Module.DataManager();

		console.log("Number of DataSets: ", dataManager.CountDataSets());
	};
An alternative is to fetch the wasm code directly.
The rest of the html code deals with calling the functions and processing results.
The web application allows the user to load datasets and then perform statistical analyses, for example request descriptive statistics or carry out a linear regression. In terms of the UI, the web application consists of a left-hand side collapsible menu. The main page content consists of sections referenced by the navigation menu. Each section consists of a left-hand panel that contains inputs (typically dataset(s) and/or single values) and a Run>> button. The right-hand panel is used to display the outputs (typically a table, but for the Moving Average we use a graph).
To use the application, run a local server and load the index.html page. Then load some data sets into the DataManager. A dataset is a single .csv file with a column of data and a heading. The heading is used as a dataset name. There are a number of examples in the SoftwareInteroperability\Data directory.
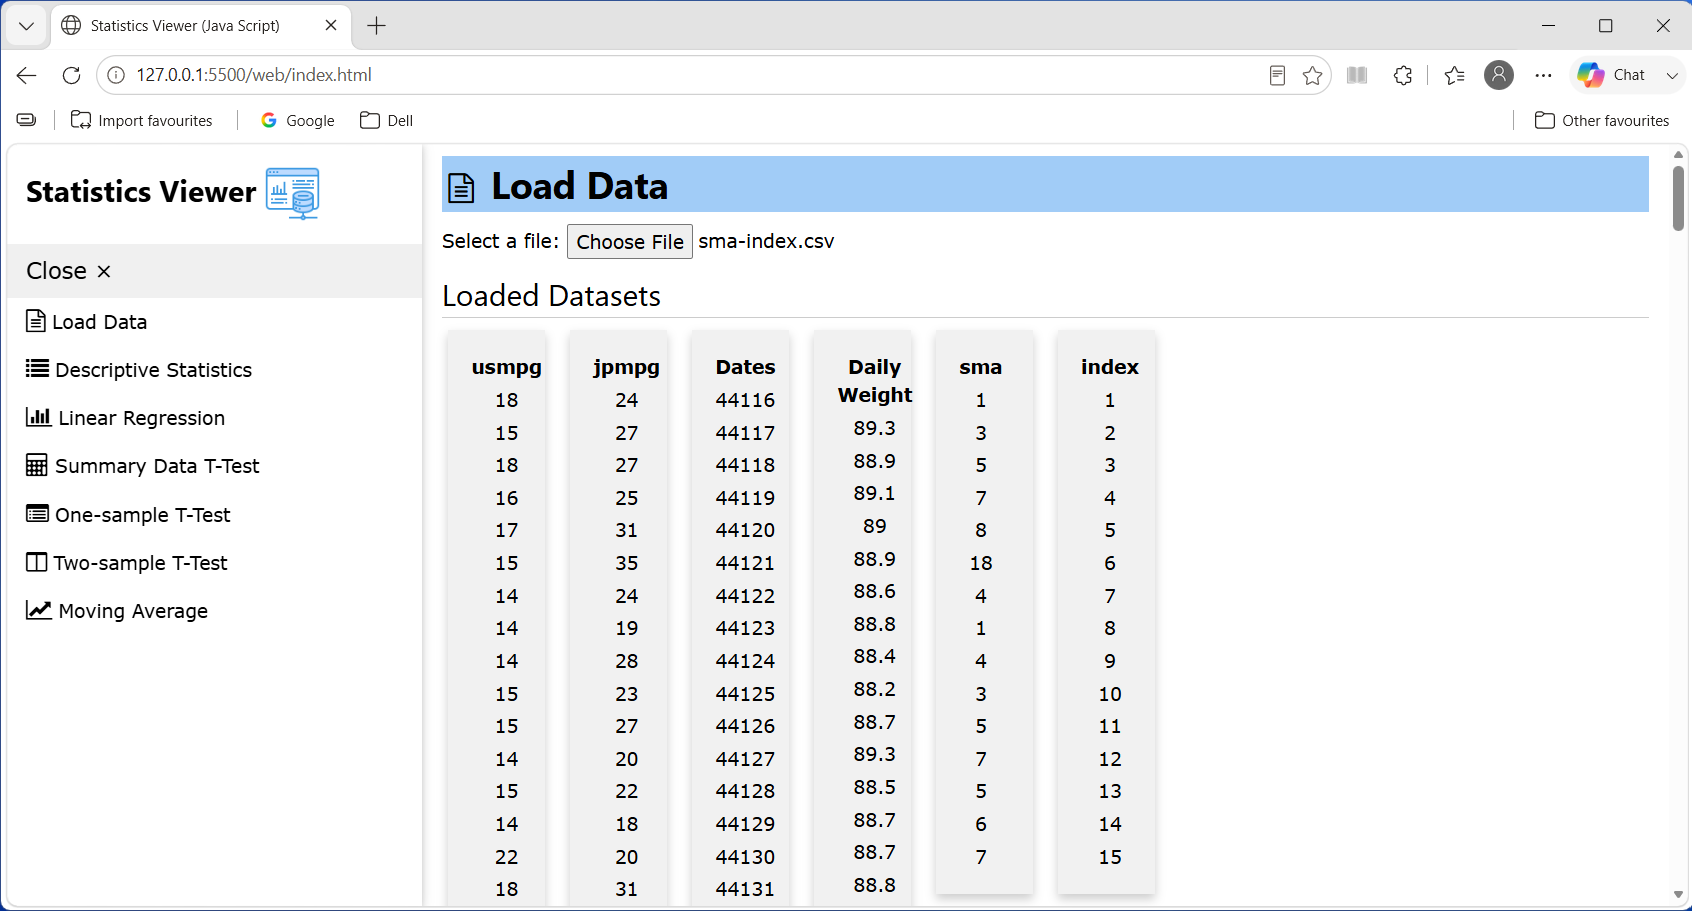
Here we see a screenshot after four datasets have been loaded.
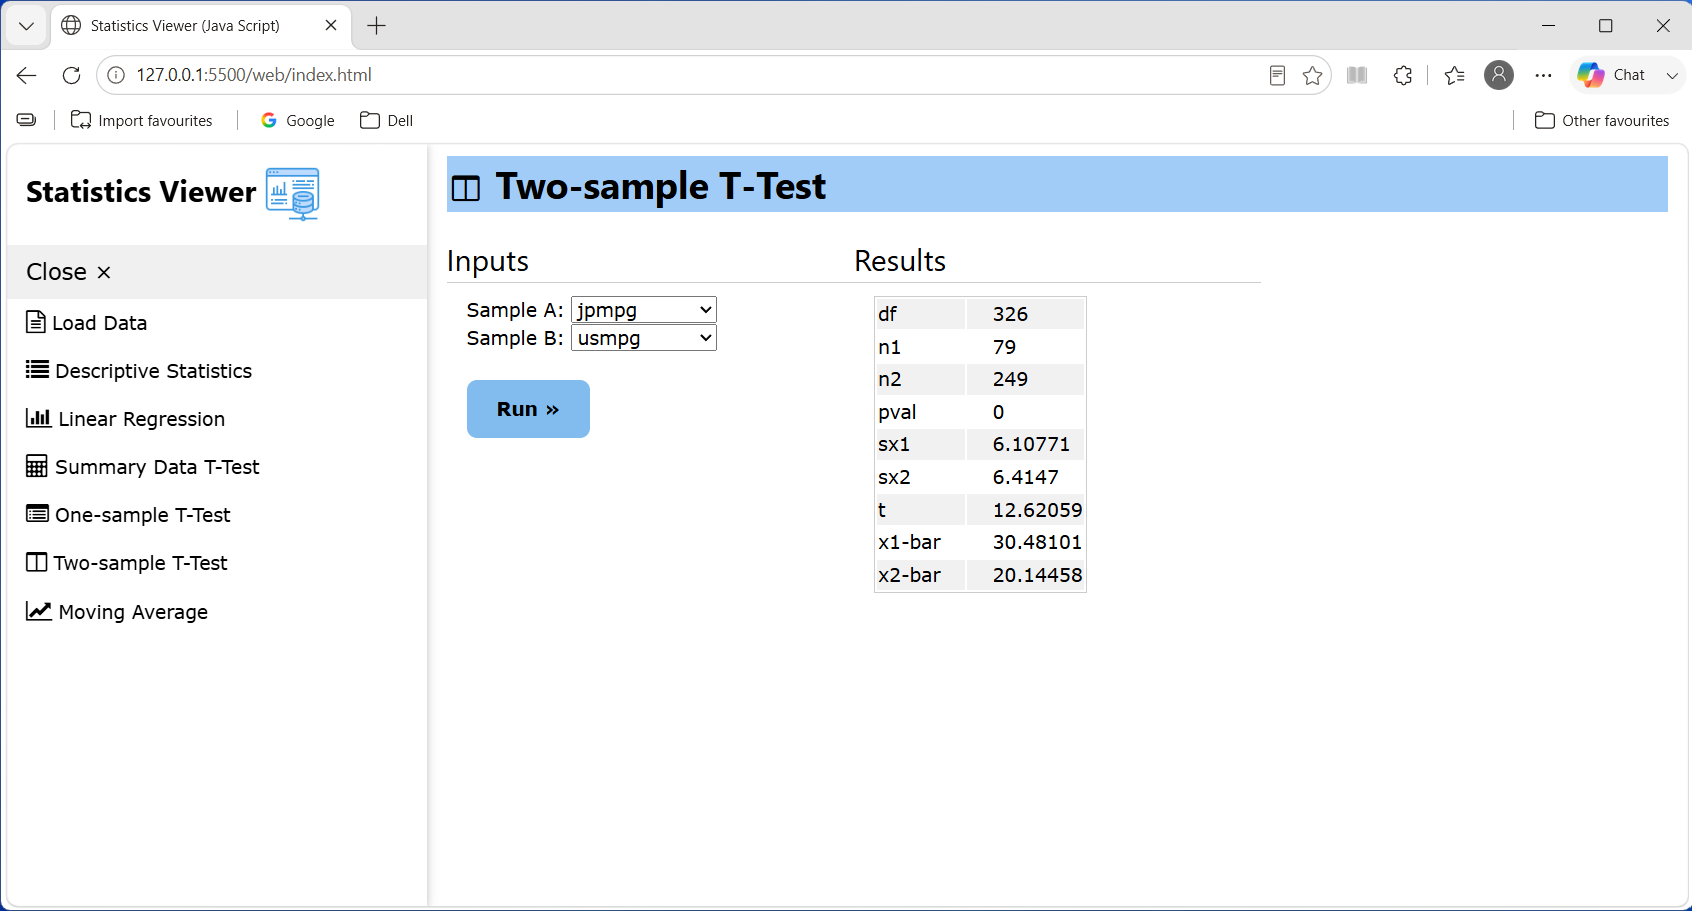
Then, depending on the dataset, we can choose Descriptive Statistics, Linear Regression, TTests, or Moving Average. Select the appropriate dataset(s) and press ‘Run’. The results are shown in a table on the right-hand side.
Debugging
Debugging makes use of the developer tools available in the web browser.
Conclusion
In this blog post we have seen how to take a native C++ library and compile it to WebAssembly using emscripten. We have seen how to use embind to define the types, classes and functions that we want to expose to JavaScript. And we have built this into a simple ‘Statistics Viewer’ web application.
See also
- Emscripten.
- WebAssembly binary toolkit (wabt): a suite of tools for inspecting and manipulating WebAssembly files.
Comments